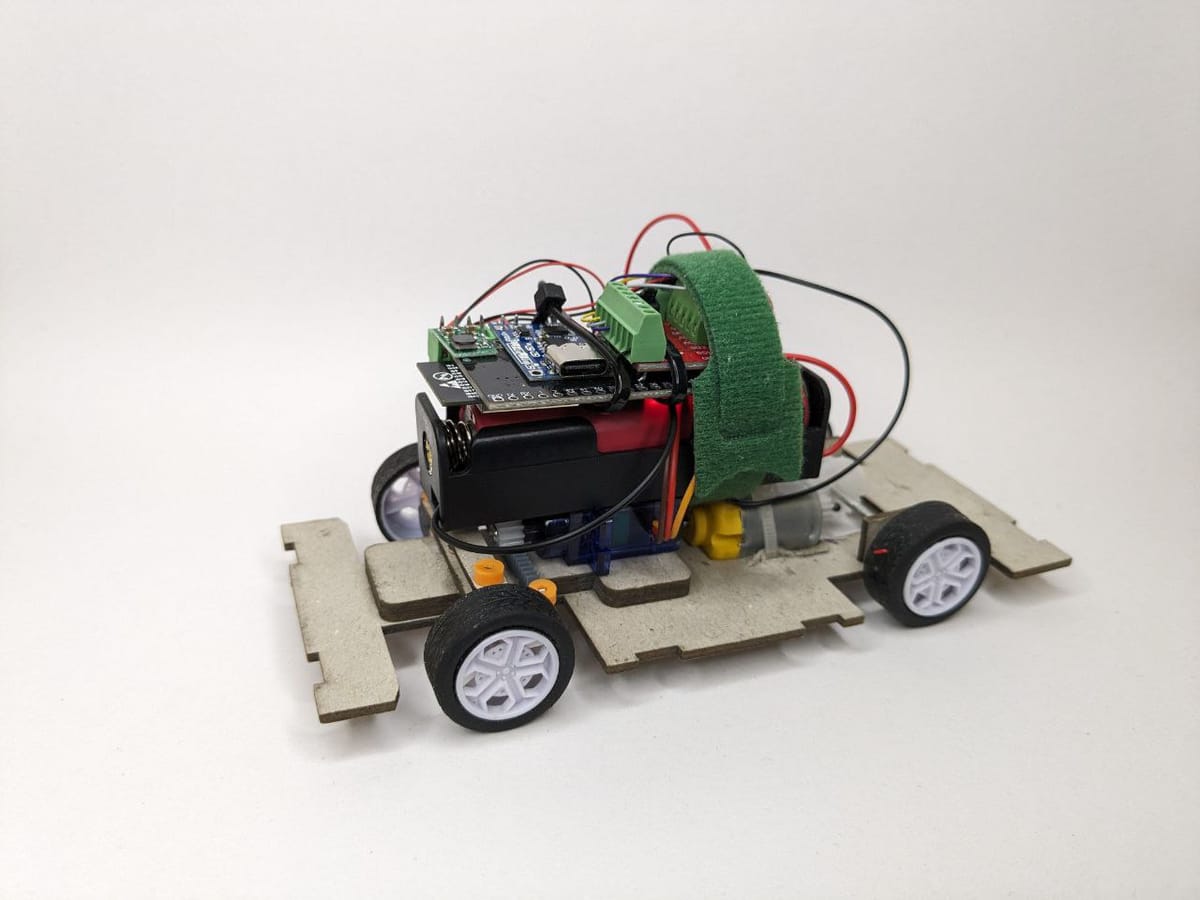
Remote control car STEM/Arduino kit: first movable version

When we work on new Toys.Engineering STEM (Science, Technology, Engineering, Mathematics) and Arduino kits, we follow our two main ideas:
- Kits should teach how to develop a hardware project from scratch. Hardware here isn’t just electronics; it’s also about aesthetics and creating cases/boxes, etc., for electronics. Just connecting a few circuits together with wires is only half of the whole hardware project.
- Everything included in kits can be replaced with items that you can buy in your local shops or on Aliexpress.
Most STEM kits only include custom circuits with all chips and electronic components on one board. This simplifies kit production for a company, but for users, it's not ideal because they don’t understand how such custom circuits work. You can read documentation, of course, but until you try to do something yourself, you won’t fully understand how it works inside. That’s why we design our kits with individual modules (or circuits or PCBs) that you should connect together yourself without soldering, just like hardware engineers prototype real hardware products.
Let’s check what electronics are required to build a remote control car:
- Brushed DC motor (if you want to build a serious, expensive RC car, you should use a BLDC motor) to move the car forward/backward.
- A DC motor driver board (or circuit).
- A servo motor to control steering.
- A battery module that will control battery charging/discharging.
- DC voltage converter (Step-up) module - a battery has a voltage between 2.7V and 4.2V, but to power a servo motor and a board with a main chip (MCU), you need a stable voltage, in our case, 5V.
- A board with SoC (System On Chip) or a circuit with CPU, memory, and wireless connectivity. This board will control both motors, lights, and send/receive messages from a remote control/mobile device over WiFi or Bluetooth.
- A battery with 3.6V nominal voltage
- A software/firmware platform to create firmware for your RC car (we use Arduino because it’s much easier to use than native microchip development kits (or SDKs) in simple projects). Don’t worry if you have never written code; you can use Toys.Engineering ready-to-use firmware for your custom RC cars. Just note that you can use it in private non-commercial projects only (for commercial usage, please contact us).
There are many different materials that you can use for a prototype and the final model, but we mostly use cardboard and paperboard because they are cheap and eco-friendly. Also, we use plastic boards for some elements where we need something very small. Everything can be found on Aliexpress (hopefully, we’ll be able to buy everything produced by European brands soon, but currently, there is no way to avoid ordering from Aliexpress).
This is our first kit in this huge Toys.Engineering project, and as usual, the first thing is the most long and complex, with many tries, errors, and sleepless nights. We design STEM kits in a 1:32 scale, and this scale introduces a few issues - it’s already not small and heavy to use motors that work for smaller scales like 1:64 or smaller, and from another side, 1:32 is still a small scale for an RC car. But we still want to use 1:32 because the idea behind Toys.Engineering STEM kits is to have the possibility to build an interactive city/layout from different kits. And of course, not everyone has a special room to keep that city if you build it in a scale of 1:25 or bigger. But why don’t we use a smaller scale? It’s easy - our kits have a lot of interactive elements with many electronic components - for example, movable doors, light, sound, etc., and we want to make it simple to assemble our kits even for users with zero modeling experience.
After around a month of development, we finally have an RC car that can be assembled by anyone 14 years old or older. The trickiest part was to find a step-up converter to provide 5V to the servo and SoC board. There is a step-up converter by Pololu, but the main problem is that the stock is very limited (you can only order it from limited shops), and it’s a bit expensive (costs 2x the price of a board with SoC). All small step-up boards that you can find in a Google search only provide 500mA, which is not enough. When you try to turn the car wheels left, those converters turn off because the overcurrent protection is triggered on the board with ESP32S3. After spending a few weeks on power optimization, we still had over 700mA required for a servo motor and ESP32S3. Of course, we can use just two step-up converters, but in this case, the number of wires that you need to connect will increase. After spending an additional 2 weeks trying to find a cheap, small step-up converter with at least 1A, we found one in a local shop in Poland, took a photo of it, and found it on Aliexpress by the photo. It’s not clear why Google doesn’t show such converters at all, but sometimes you can still find more in local shops than with Google.
After we found a tiny step-up converter, we finally can play with the first movable car that has fine physics for such cardboard car and can even drift.
Remote control car build kit, first tests
What’s next? We should add front and rear lamps, and some decoration, and the STEM RC car is ready. Follow us and feel free to contact us at hey@toys.engineering if you have feedback or ideas for the next kit.